
Since a long time I’m looking for a small set of dungeon tiles. The main goal is to use them for pulp Egypt games, but should work also for Arabian fantasy games like D&D Al-Qadim.
I wanted something looking like sandstone tiles, dusty but without pushing too hard in the Egyptian style. Specific style details will added later, using scenery items when setting the board (columns, statues etc)
Most of the tiles available on the market go for 100% Egyptian theme or into the “rocky” classic dungeon, none is really balanced half way. Since I don’t need too many I decided to build my own set of tiles.
My first choice was to build my own mould and cast the tiles following the huge amount of information about casting available online. Sadly my poor criteria choosing the silicone turned into the worse mould ever seen, I casted it a few times using Sculptamold and got half a dozen tiles of awful quality and very bulky.
 The feedback after the first batch of castings was really bad, casting is boring, takes more time than it looks like (professional casters you have my respect!) and the tiles were really far from what I expected, but during the casting process I realized the Sulptamold is a product with really interesting properties.
So I decided to change the plan. As I had the real fun modelling the original tile for the mould, I decided to model all the tiles, yes one by one, as I said I don’t need a vast production, and in that way every tile will look different.
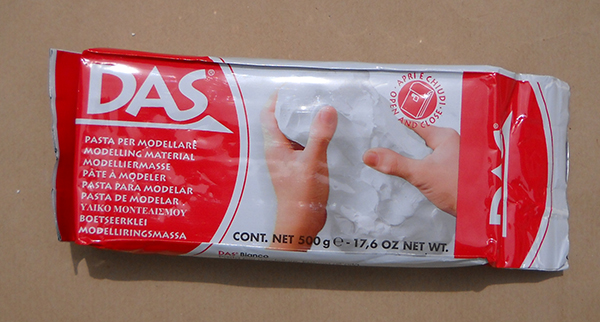
I found Sulptamold was not suitable for this new approach, so I picked a new product, modelling clay Das, available in white or brown, its air-hardening, it has less definition than Sculpy but don’t needs baking, and its much cheaper (1Kg pack 6€)
 That’s what I got after a couple of evenings modelling.
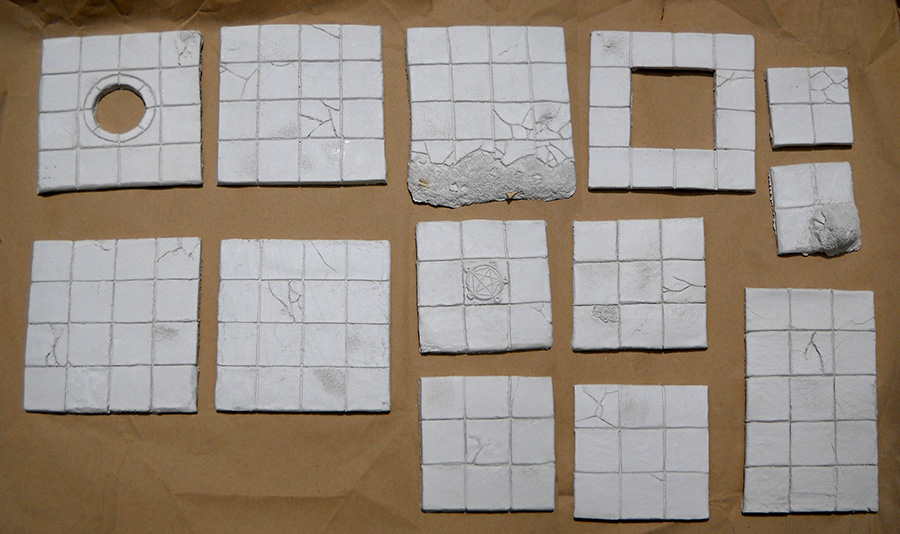
 The tile photo allows you to see the detail definition of the Das clay, I think is good enough for that project, as you can appreciate the job don’t requires top-level skills modelling. As modelling tools I used a roller to laminate the clay, toothpick and a modeling lancet to sculpt, and a hair-metal brush for textures.
I left the tiles drying, a few hours to hard, but several days to be 100% dried. I would say after a few hours, despite it looks dry, if you wet the piece you can soft it and work again with it, like traditional clay, but I didn’t tried it.
On the meantime, since I only modelled rooms with the Das clay I decided to get back the sculptamold tiles, I sawed and sanded them to build a few corridors for my dungeon.
As I previously said I think sculptamold has a lot of possibilities, is good for casting but when half dry it can also be modelled in basic shapes but keeping nice texture. I decided to try a test building some dirt tunnel corridors and room tiles.
I mixed sculptamold, and as he gets their “porridge” look I simply throw it over a surface in the shape of the desired corridors and rooms (previously I tested sculptamold don’t adheres to that plastic surface).
 After 30-40 minutes, when it’s hard, I bended the plastic surface to make the pieces “pop” from it, its important the timing, too soon the piece will be too soft and will crack, if too late the possibilities of adherence increase and then it will crack too.
 Once removed I let them dry, it took a few days to completely dry.
When dried I cut some cardboard bases to give the sculptamold a bit more of resistance, glued, added Vallejo Pumice coarse paste, and ready to go to the painter.

 Update: Some shots of the final tiles painted
General view and a couple of close views


About the irregular tunnels that’s how they look after a quick spray and dry brush painting, I’m not too satisfied on how they look, I will keep them unvarnished and maybe i rework on them in the future. Here you can see how they work together, tunnels with the square tiles

One the floor tiles has a removable central part, in order to replace the central tiles for other bits according the game, traps, stairs going down, in the shot you can see how it looks as the usual trap and the snake pit.


As last note, please a moment of silence for the memory of this miniature, from the arab range of Mega, which after the photo session was varnished with a corrupted Vallejo varnish, previous week it was fine, I used it to varnish the tiles.
Now you can see how the poor guy looks, the statues and the stone golem where also varnished on the same pack but I succeed to remove most of the varnish.


The tiles look beautiful, but being made of clay and card, are you worried about them chipping and breaking without delicate handling?
Well is more sensible to damage than only cardboard, but the cardboard base gives a lot of resistance.
In the other hand, when gluing if you display a nice layer of glue it will stick the bits in place in case of impact.
More dangerous than the clay tile breaking apart is the fact the layer of paint can easily crack without the protection of a thick layer of varnish.
Hi – could you tell me how THICK the Das tiles were when you were done sculpting them? I did the same thing (based on your thread at LAF) and they ended up too thin, when I lifted them they broke apart.
4mm the DAS tile, plus 3mm of the foamboard base.
Are you trying to lift them when they are dried or still fresh?
I use to put a layer of plastic film under the clay, since when you press the DAS clay it sticks to the working surface, even if wet.
If you try to removed the tiles when is still fresh it will break, make crackes or deform. The plastic film (a plastic bag or the film to wrap food) helps you to manipulate the tile until dried.
Hope this helps.